Quickstart
Create an API key and test your integration with a first invoice.
Getting an API key
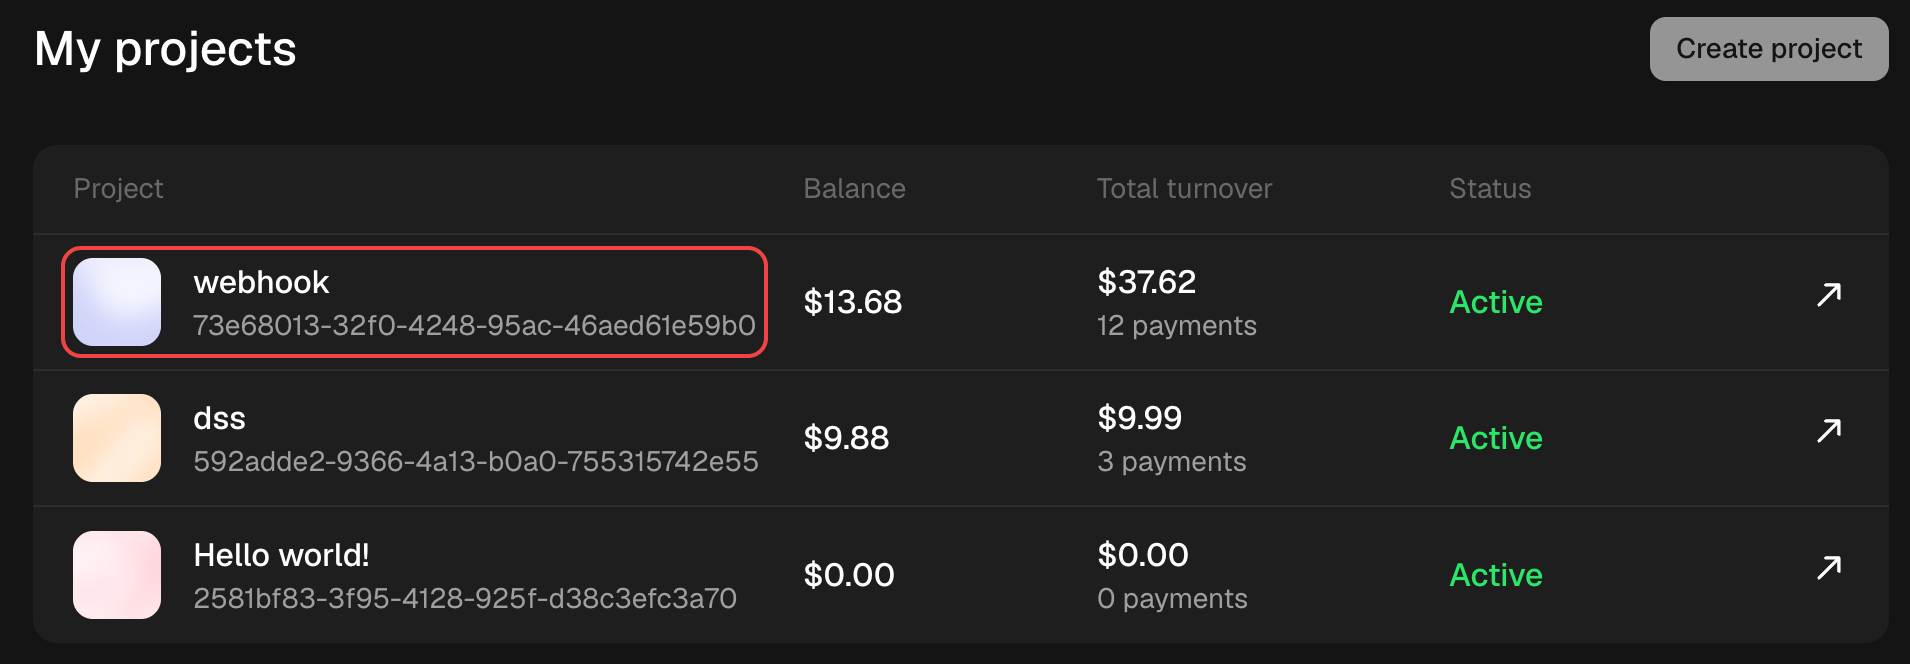
1. Open the Atomic Pay dashboard and select the project that needs a key.
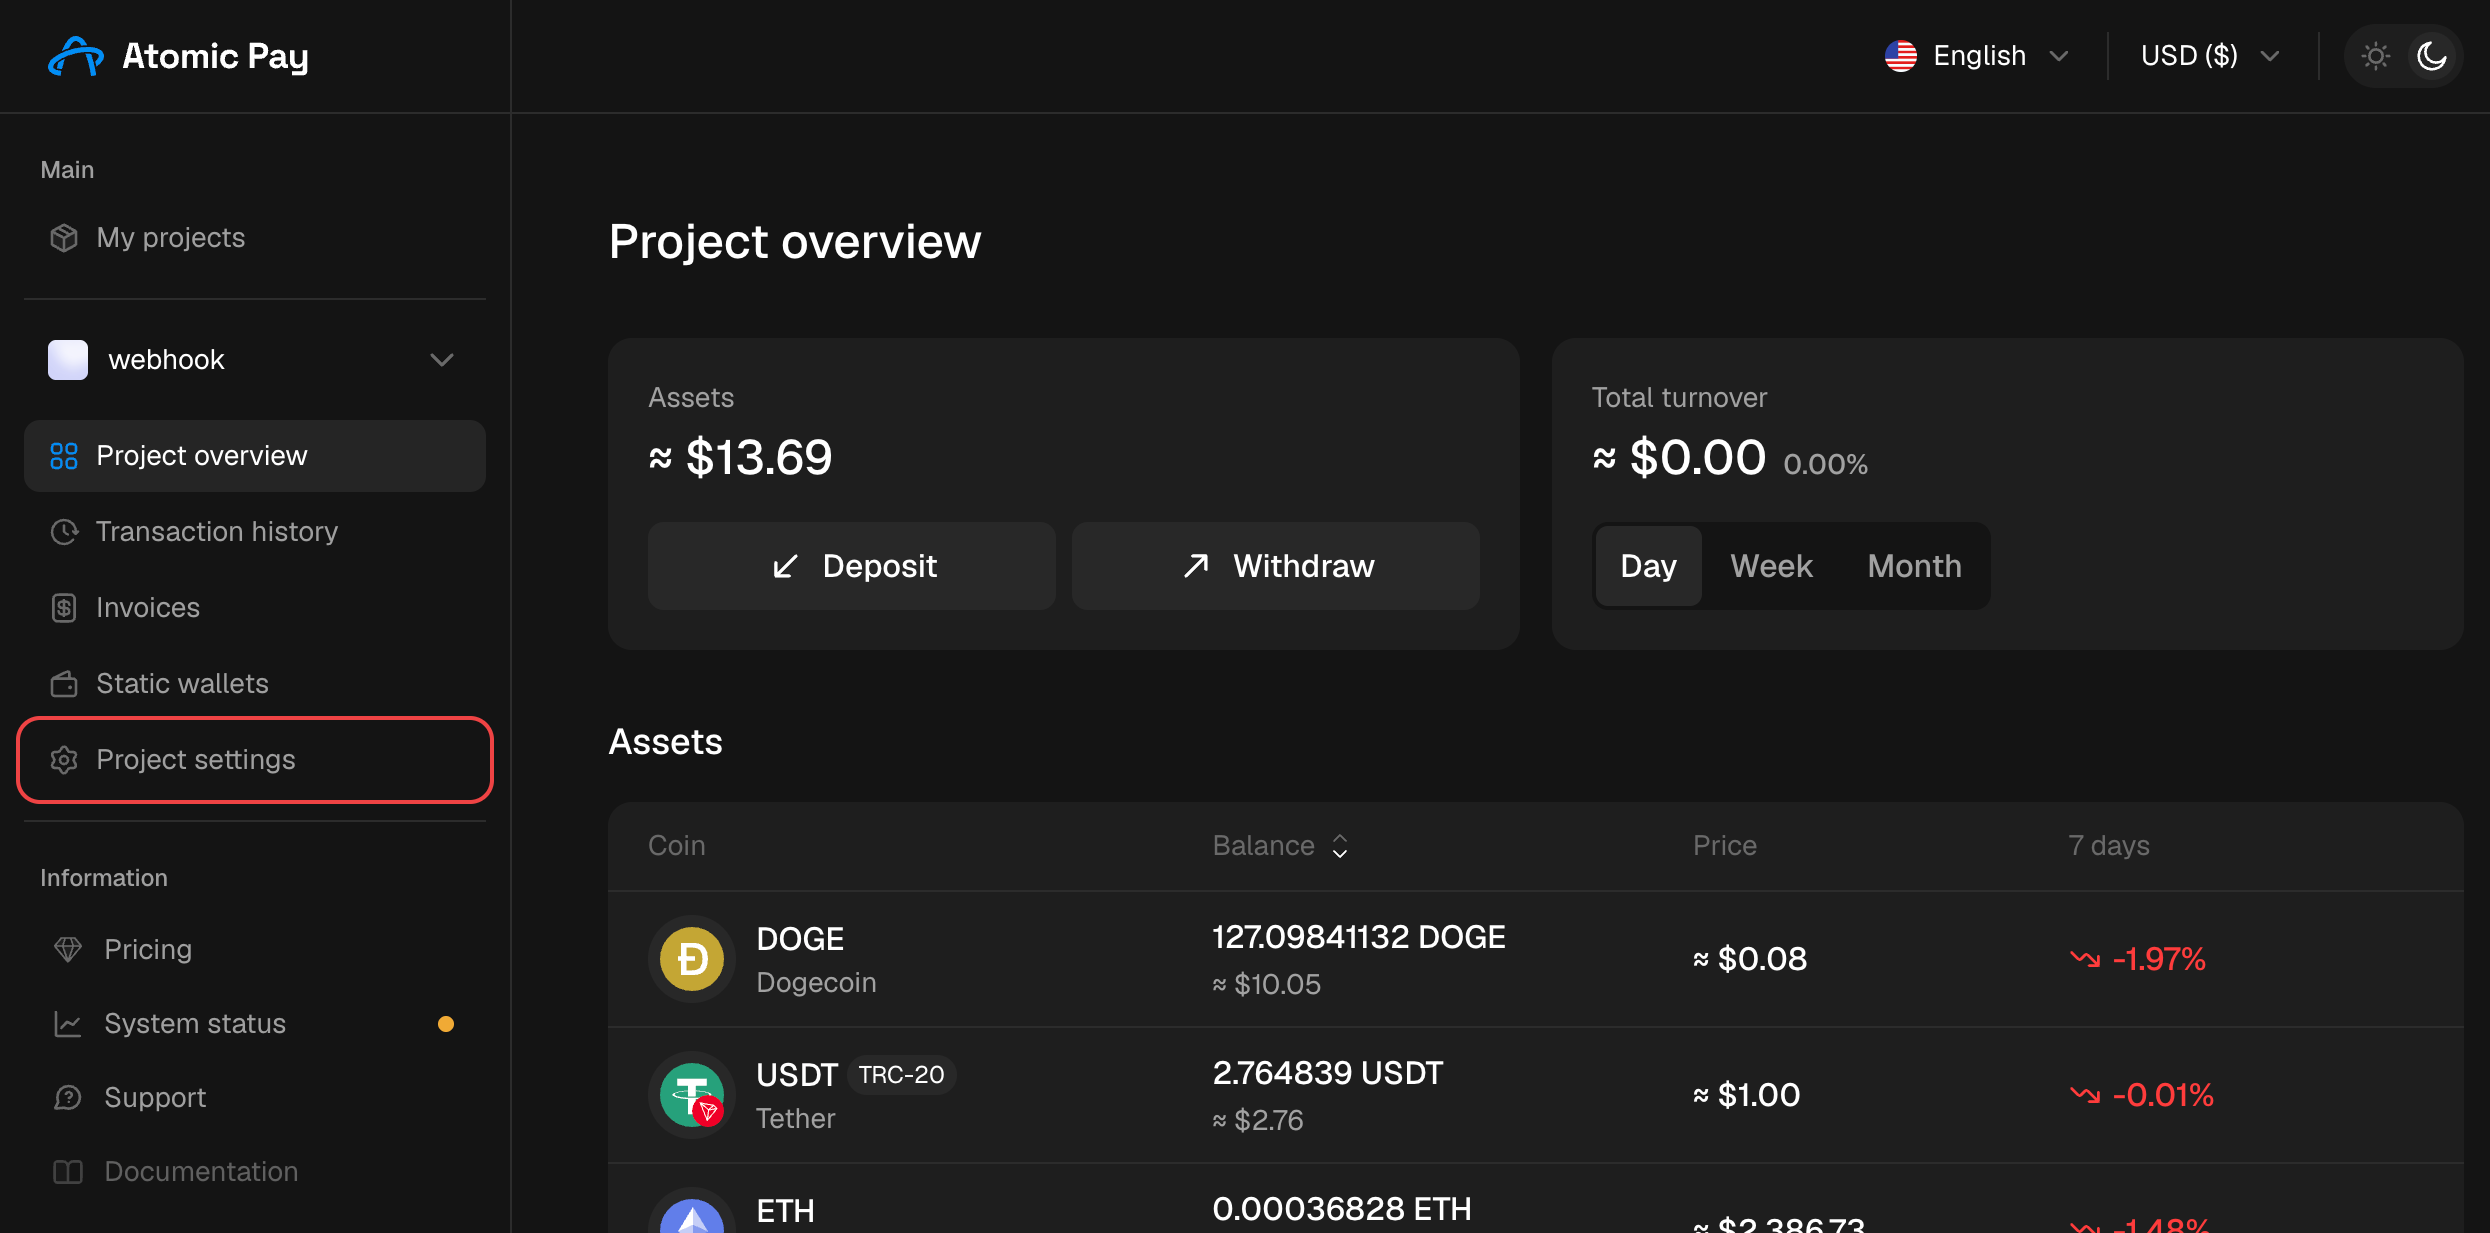
2. Open the project settings.
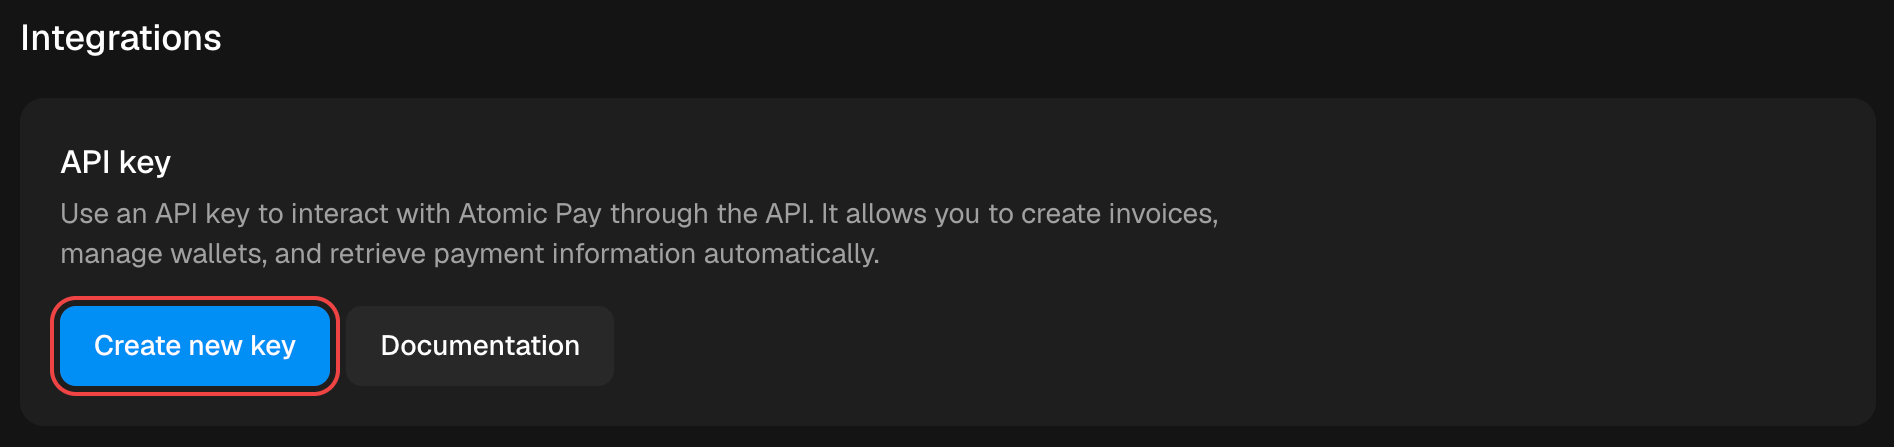
3. In the «Integrations» section, click «Create new key» in the API key block.
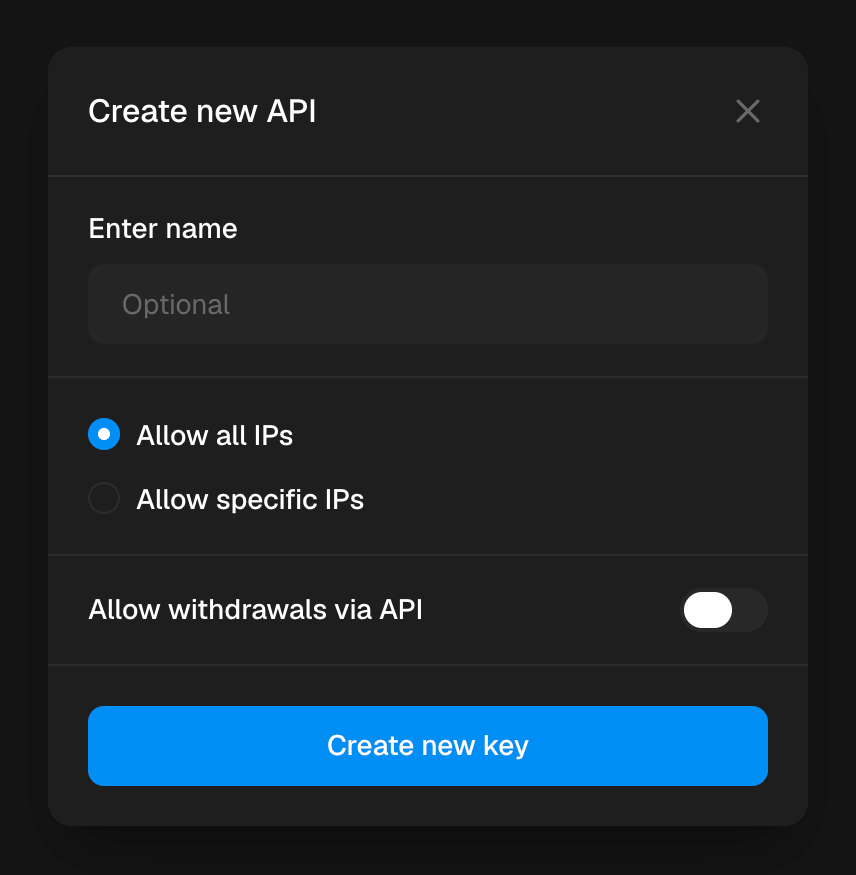
4. Name the key and choose its access settings: allowed IPs and whether withdrawals via API are allowed.
5. Save the key — it cannot be viewed again after the dialog is closed. Use it to authorize Merchant API requests.
First integration
- Get the coins and networks available to the project via
GET /project/currencies. - Create your first invoice with
POST /invoices. - Store the invoice
uuidfrom the response. - Set up a webhook in the project dashboard.
- Wait for the webhook about the invoice status change.
- Check the current invoice state via
GET /invoices/{invoiceId}.
This order lets you check the available assets, create a test invoice and make sure that API requests and webhooks work correctly.